Atmospheric Control
XRF analysis is improved through controlling atmospheric parameters. In dry ambient air, the Nitrogen, Oxygen, and Argon gasses can easily absorb photons returning from your sample. But it doesn’t just end there. Most handheld units also include a protective plastic window - this too will affect your sensitivity to light elements. The lighter the element, the stronger the effect. The Bruker Tracer comes with a portable vacuum, and here is an example of the change in sensitivity in a normal silicate sample.
XRF analysis is improved through controlling atmospheric parameters. In dry ambient air, the Nitrogen, Oxygen, and Argon gasses can easily absorb photons returning from your sample. But it doesn’t just end there. Most handheld units also include a protective plastic window - this too will affect your sensitivity to light elements. The lighter the element, the stronger the effect. The Bruker Tracer comes with a portable vacuum, and here is an example of the change in sensitivity in a normal silicate sample.
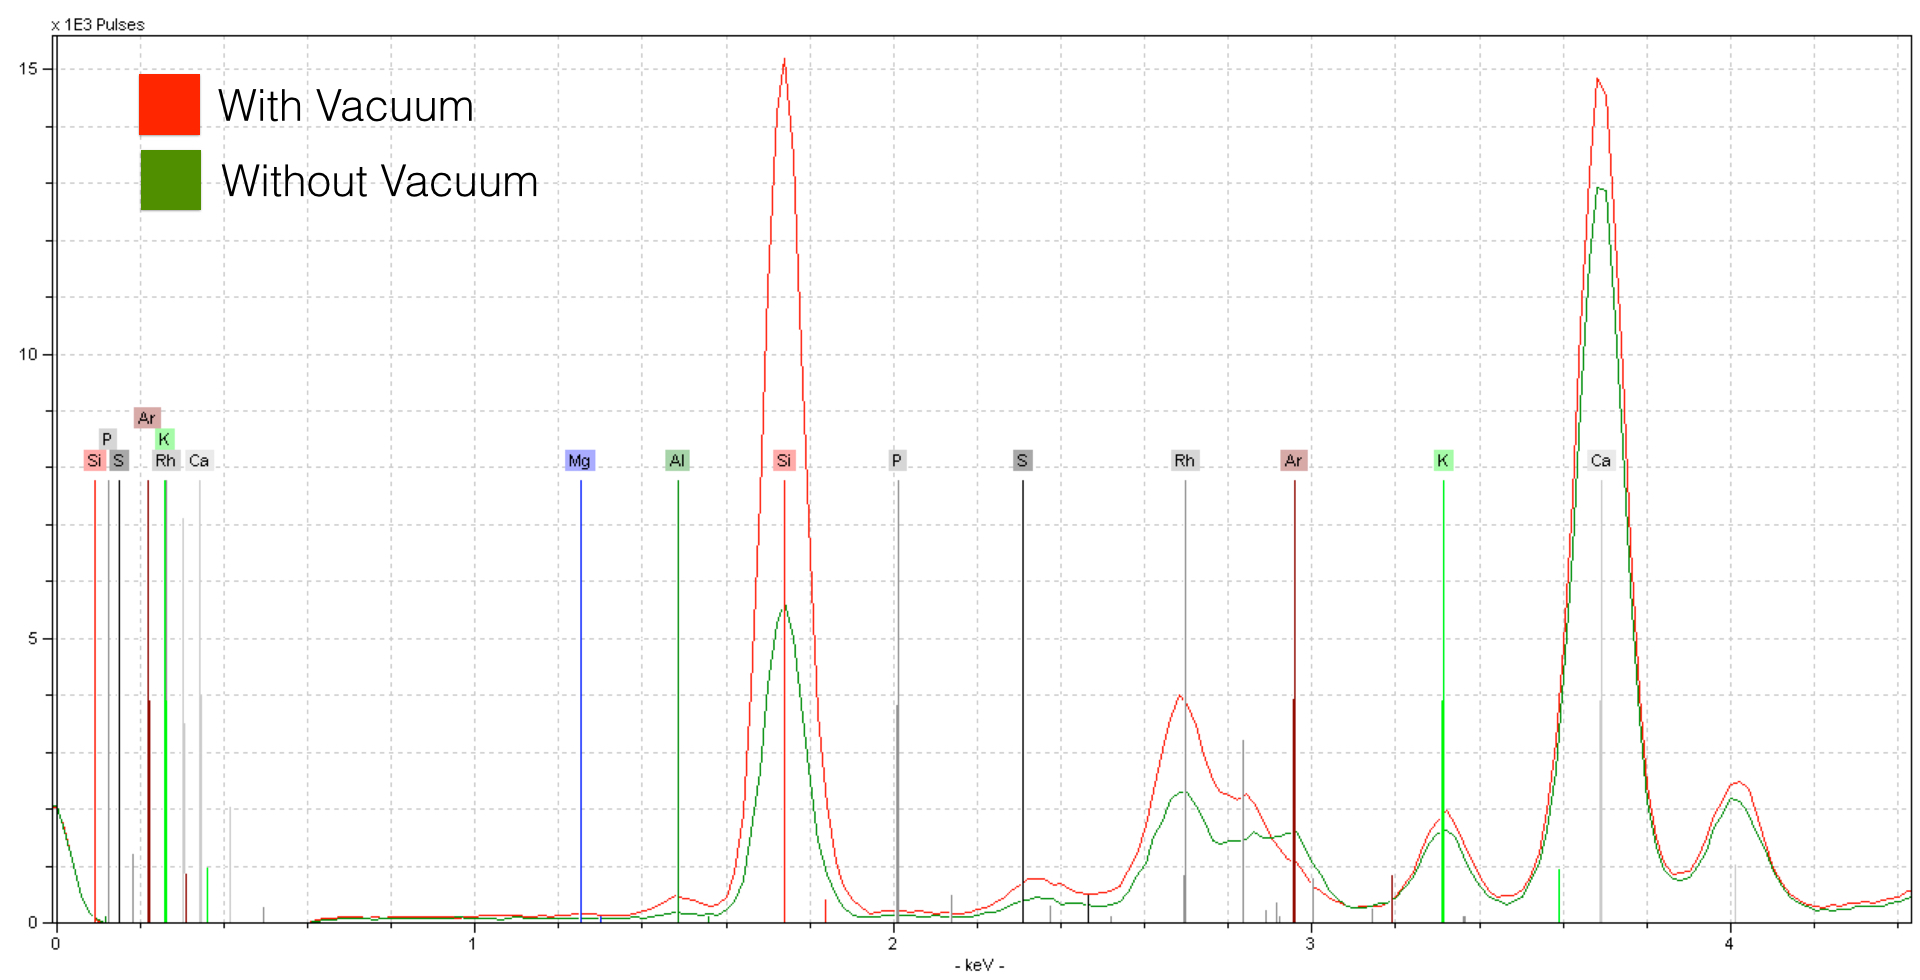
The spectra acquired from the sample with a vacuum shows tremendous improvement over the spectrum taken in dry air conditions. For elements like Calcium the effect is somewhat reduced - for lighter elements like Sillicon and Aluminum the effect is much stronger. Note as well that Argon is present in the spectrum taken in dry air conditions (green) while the vacuum spectra (red) does not include this element. Argon is a noble gas - in this case we are seeing the concentration of Argon in the atmosphere (0.93%). However good the improvement is here, it isn’t maximum sensitivity. This because there is a 4 μm thick prolene layer in addition to a vacuum grid - this too forms part of the atmosphere, at least with respect to the photons. We can remove this prolene window, and then flow helium through the XRF unit - this allows us to measure in about as pure of an atmosphere as is possible.
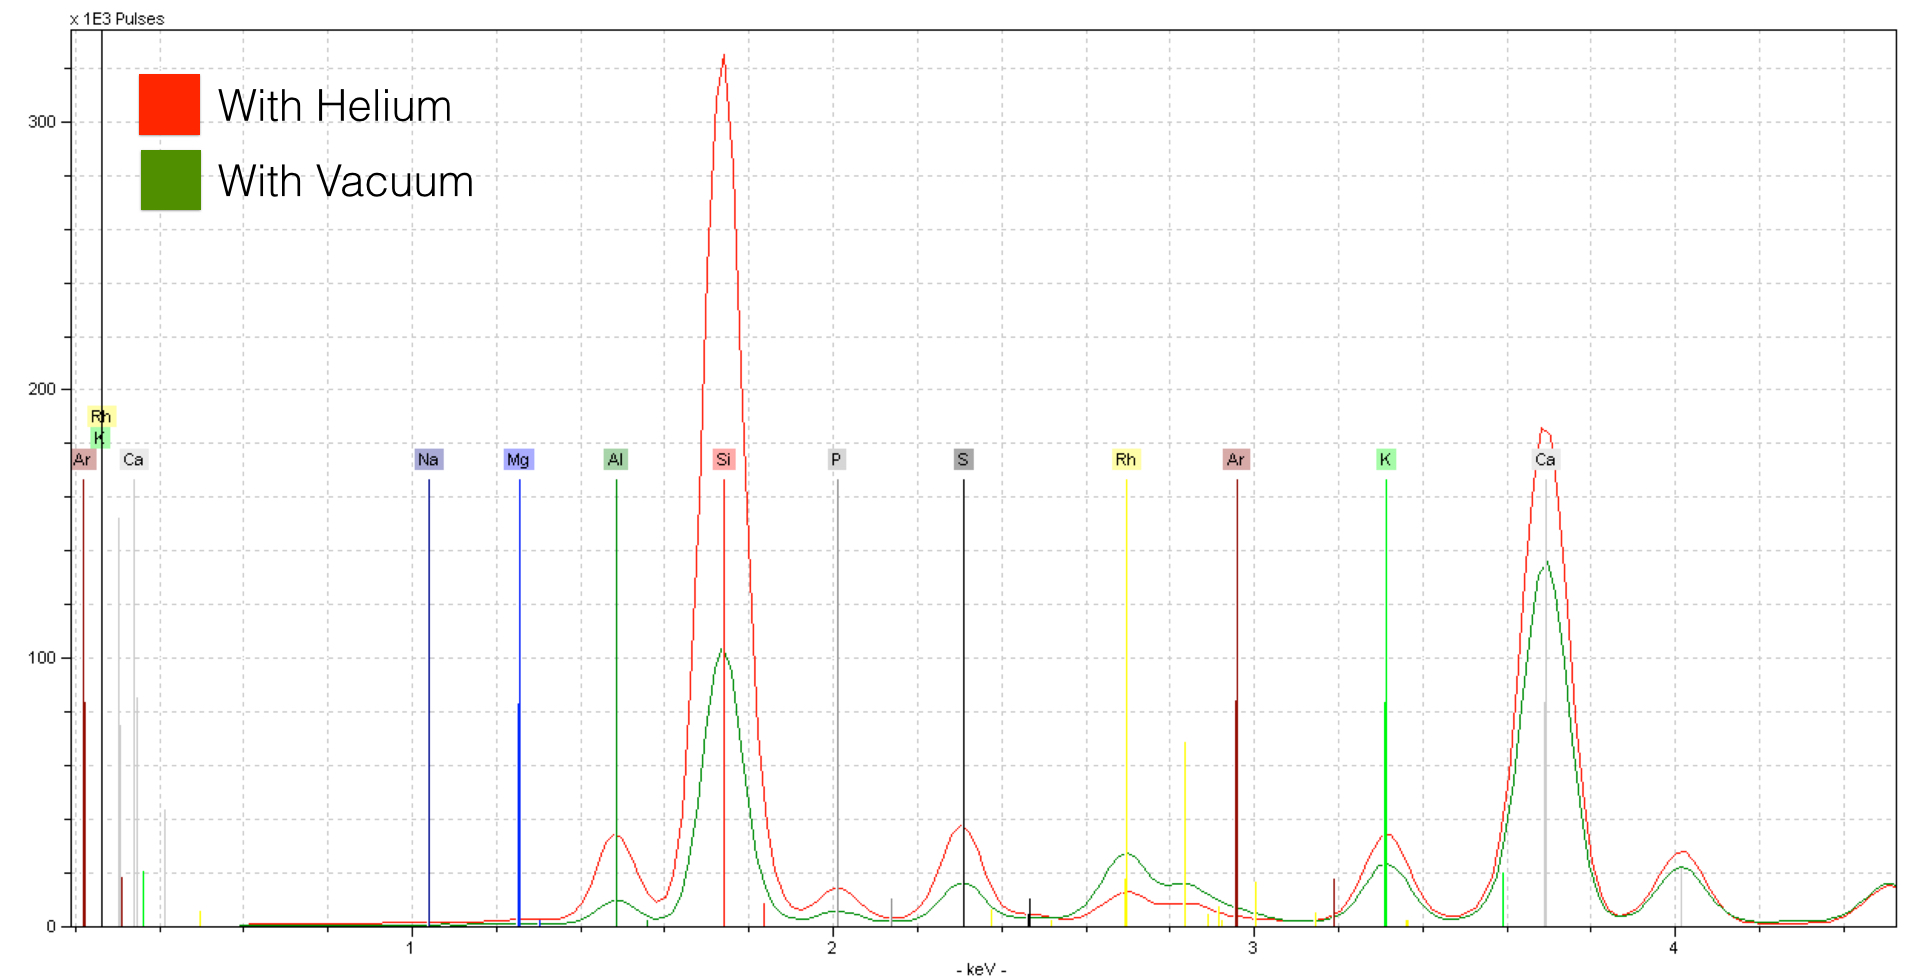
A Helium flow has a tremendous effect on the quality of the spectrum. The effect on light elements like Silicon (Si) is striking. If we take a look at lighter elements like Magnesium, we see an even stronger effect.
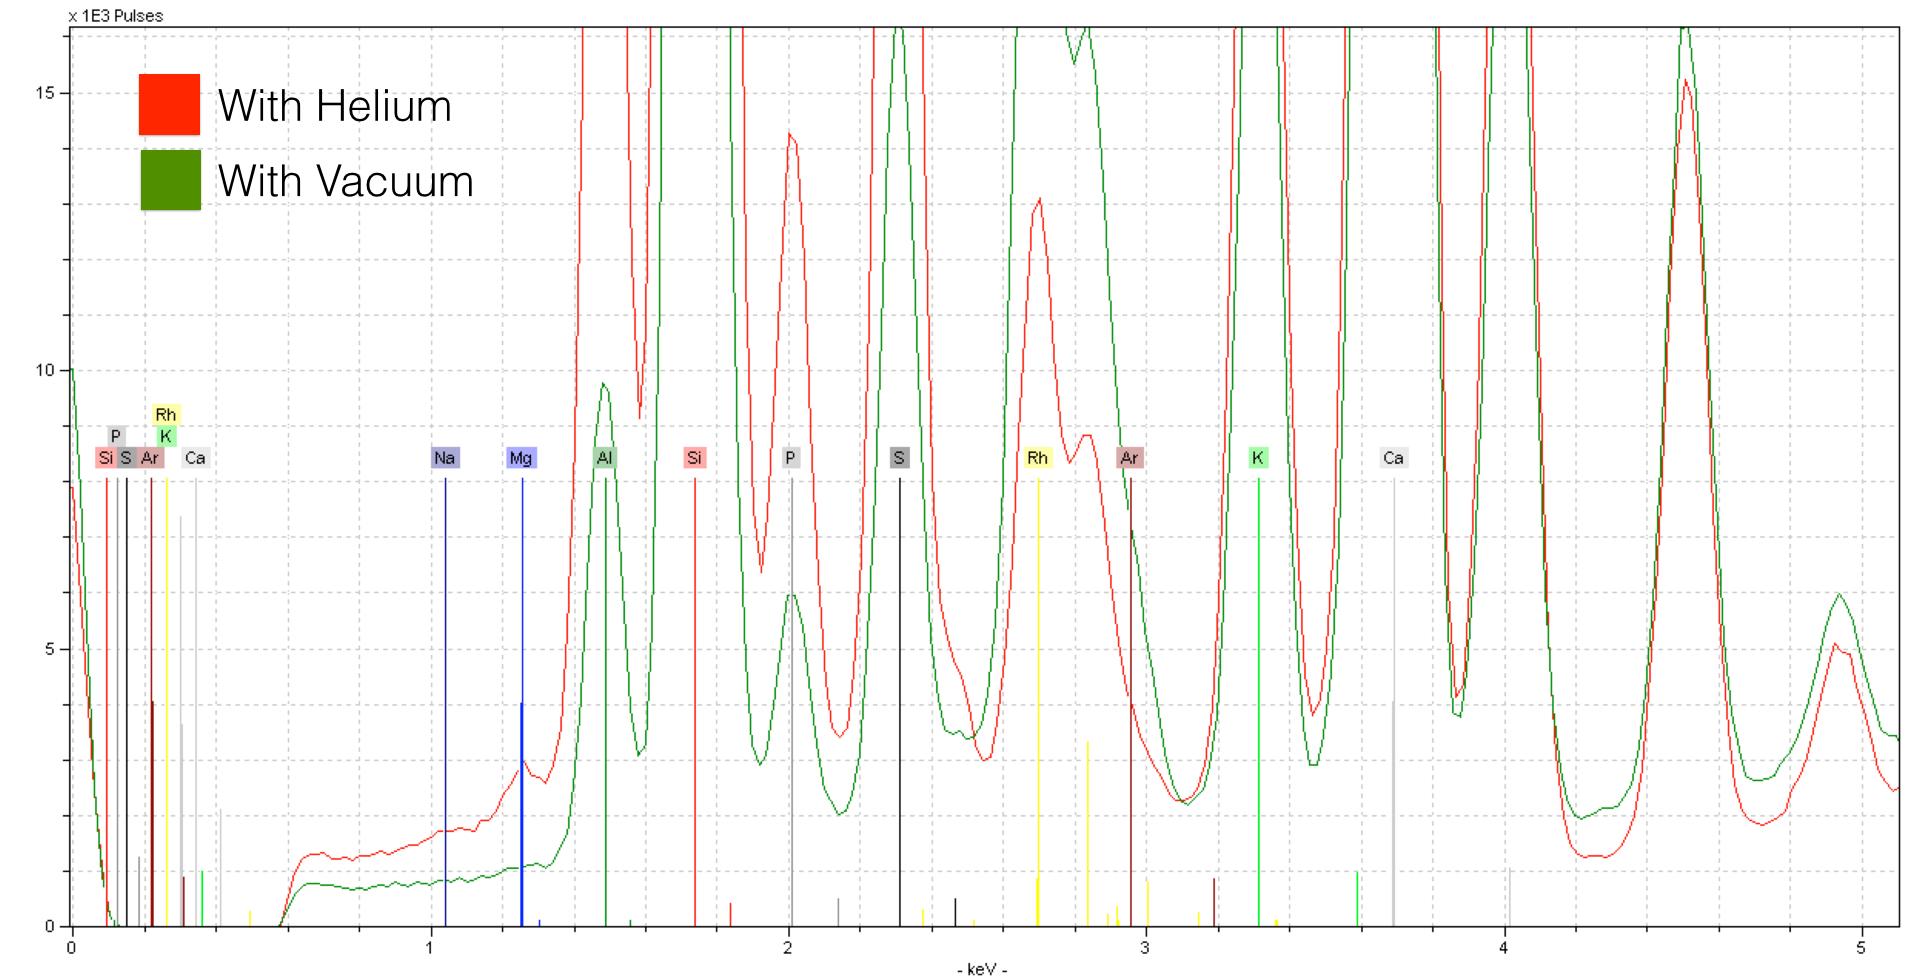
Here, the increased sensitivity makes all the difference in seeing a light element like Magnesium (Mg) - here in concentrations of about ~0.7%. If you look closely, you can see the peak for Sodium (Na) - it is indeed present in concentrations of about ~0.7% as well. Using Helium is critical to seeing concentrations of this element. However, to do so certain precautions need to be taken. Because you are analyzing without a protective window, you will want to keep the detector pointed either laterally or down - do not place samples directly on top. See the following photo for an example.
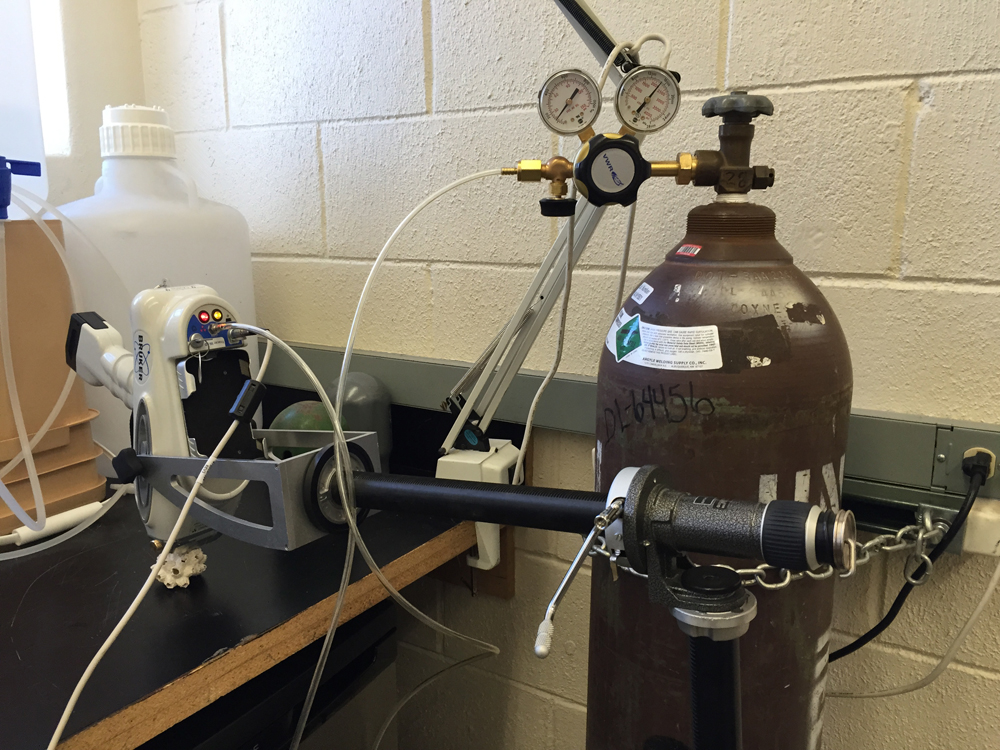
Here a tripod is used to lower the XRF unit down onto the sample. You can see a helium regulator to the right on top of the Helium tank. Important point - start helium flow BEFORE you connect to the Tracer. That way you protect the Tracer from any errors in regulation helium flow. The risk is that the flow is too quick and risks internal damage to the system.
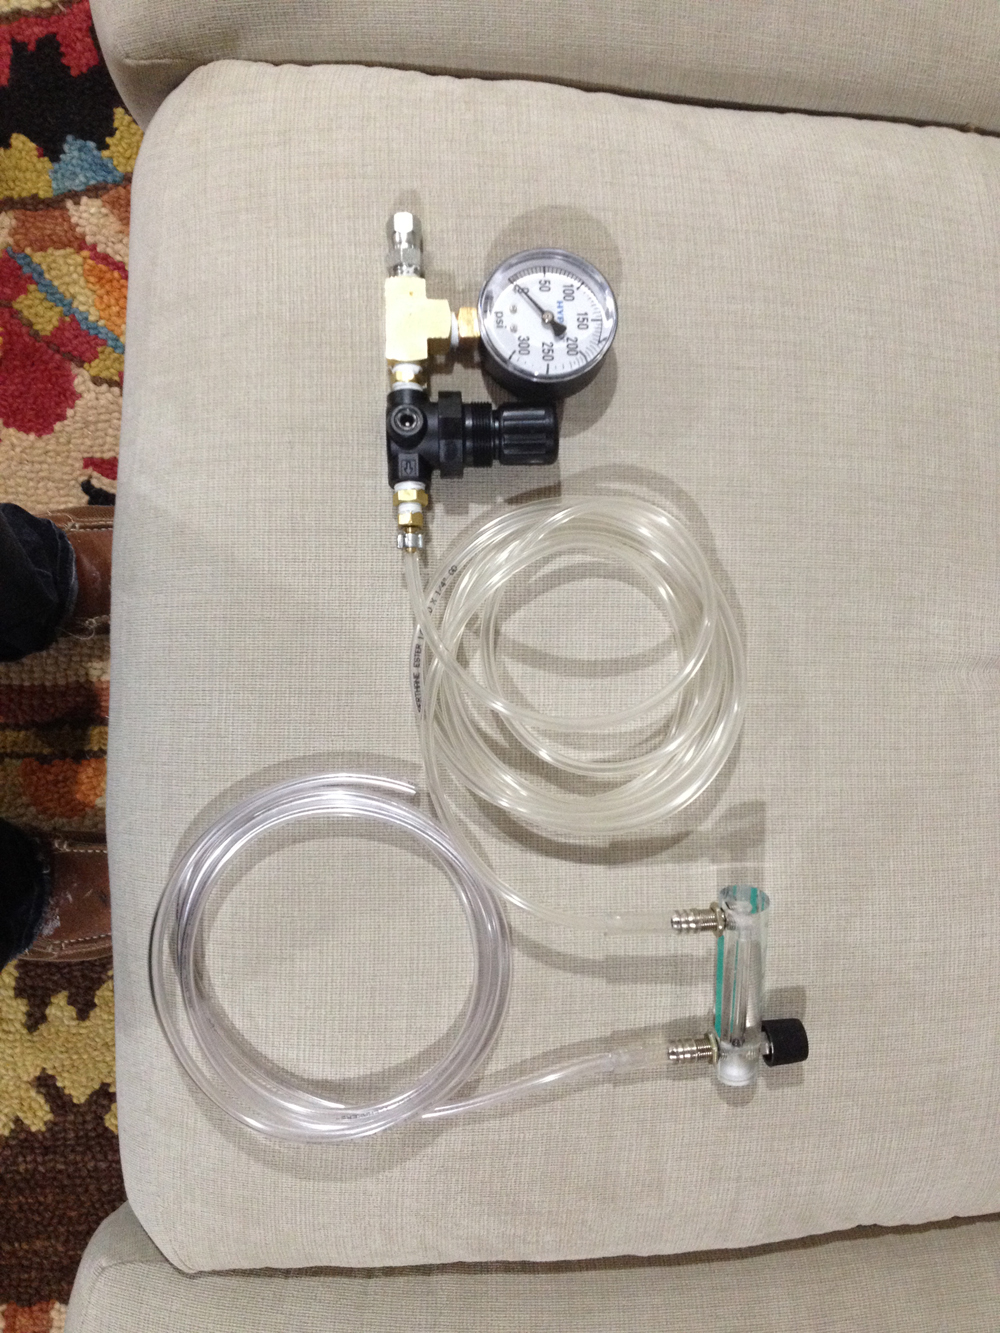
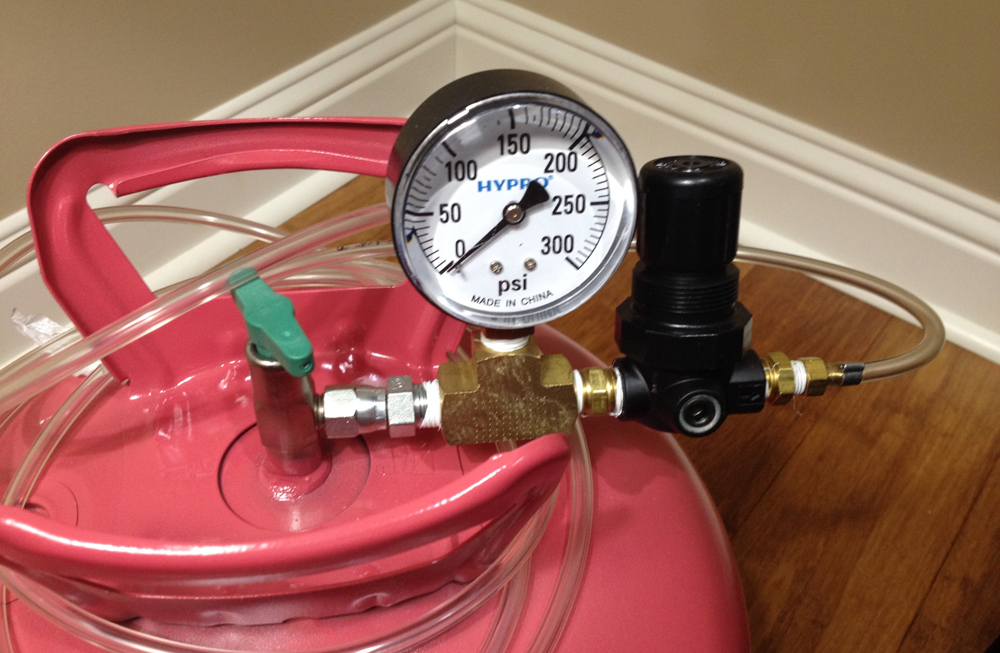
Turn on the helium tank to a heavy flow. Rely upon the regulator to throttle the flow down. This is so that the pressure on the regulator stays constant. A common error is to turn the helium tank on low with the regulator. This will work fine for a little while, but eventually the flow starts ebbing as pressure in the tank drops - this is hard to notice when you are taking many spectra. It is better to let the regulator handle the flow rate and keep the helium tank at a higher flow rate to maintain pressure. On the regulator, the flow rate you want to aim for is 0.4 LPM - but in reality this is a very difficult thing to attain with most regulators as your indicator will essentially be resting on 0. It is better to go by feel. Turn the regulator down low enough so that you can barely hear it and barely feel it brush against your cheek. You can get an ideal regulator to help as well, like the one pictured below.
Turn on the helium tank to a heavy flow. Rely upon the regulator to throttle the flow down. This is so that the pressure on the regulator stays constant. A common error is to turn the helium tank on low with the regulator. This will work fine for a little while, but eventually the flow starts ebbing as pressure in the tank drops - this is hard to notice when you are taking many spectra. It is better to let the regulator handle the flow rate and keep the helium tank at a higher flow rate to maintain pressure. On the regulator, the flow rate you want to aim for is 0.4 LPM - but in reality this is a very difficult thing to attain with most regulators as your indicator will essentially be resting on 0. It is better to go by feel. Turn the regulator down low enough so that you can barely hear it and barely feel it brush against your cheek. You can get an ideal regulator to help as well, like the one pictured below.